How to set up ticket types
Get started with tickets, and assigning categories to your ticket types.
Written By Kateryna Babenko
Last updated About 9 hours ago
Overview
Before you can create tickets from the Inbox, you need to set up the ticket types your team will use. A ticket type defines the category (Customer, Back-office, or Tracker), the data fields to capture, the available statuses, and the access rules.
Ticket types can be configured from Settings → Support → Ticketing.
Before reading this article, we recommend reading when to use Customer, Back-office, and Tracker tickets. Understanding how each ticket type works in practice will help you decide on the right configurations for your team.
Create a new ticket type
Go to Settings → Support → Ticketing and click ‘Add ticket type’ in the top right corner.
Choose the ticket category
In the General section, select the ticket category:
Customer tickets - When your team needs more time to work on issues, use Customer tickets to capture, track and automatically share progress with the customer.
Back-office tickets - When a Support rep needs to collaborate with back-office teams to resolve an issue, create a linked Back-office ticket from a conversation for seamless collaboration.
Tracker tickets - Streamline problems impacting many customers, such as bugs, service interruptions, and feature requests.
The category determines visibility, communication rules, and which configuration sections are available. For a detailed comparison, see when to use Customer, Back-office, and Tracker tickets →
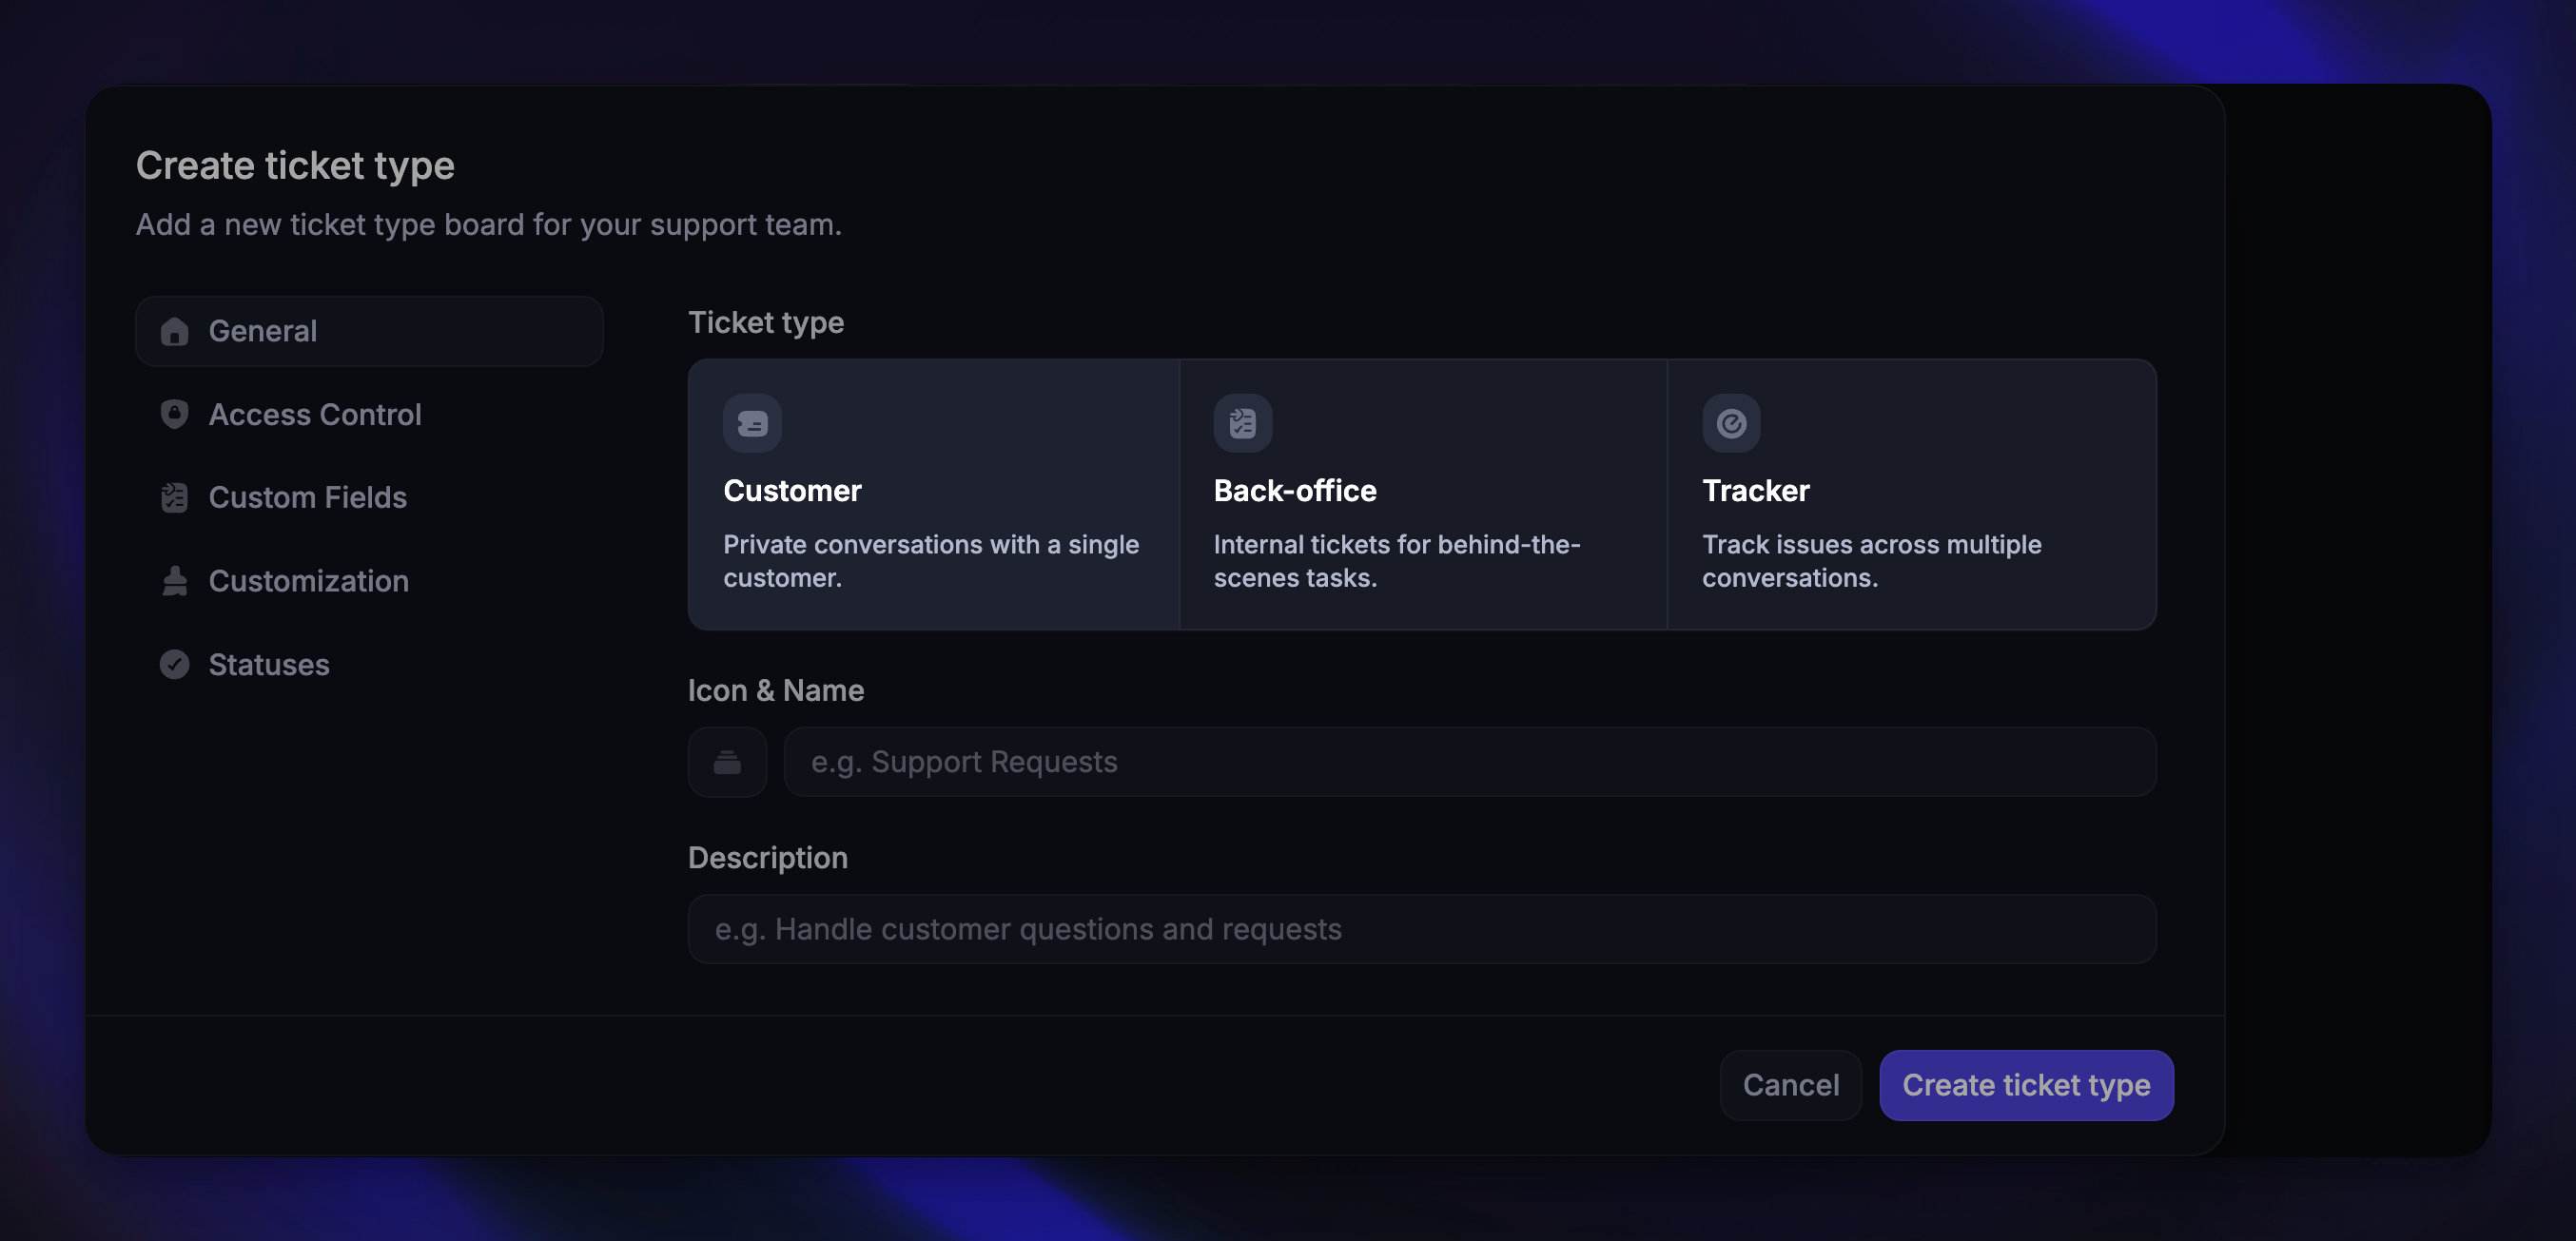
Set the icon, name, and description
Icon - Choose a custom icon for your ticket type using the icon picker
Name - Give your ticket type a meaningful name. For Customer tickets, this name is visible to customers when they submit tickets
Description - Add an internal description to help your team know when to use this ticket type. The description is never shared with customers
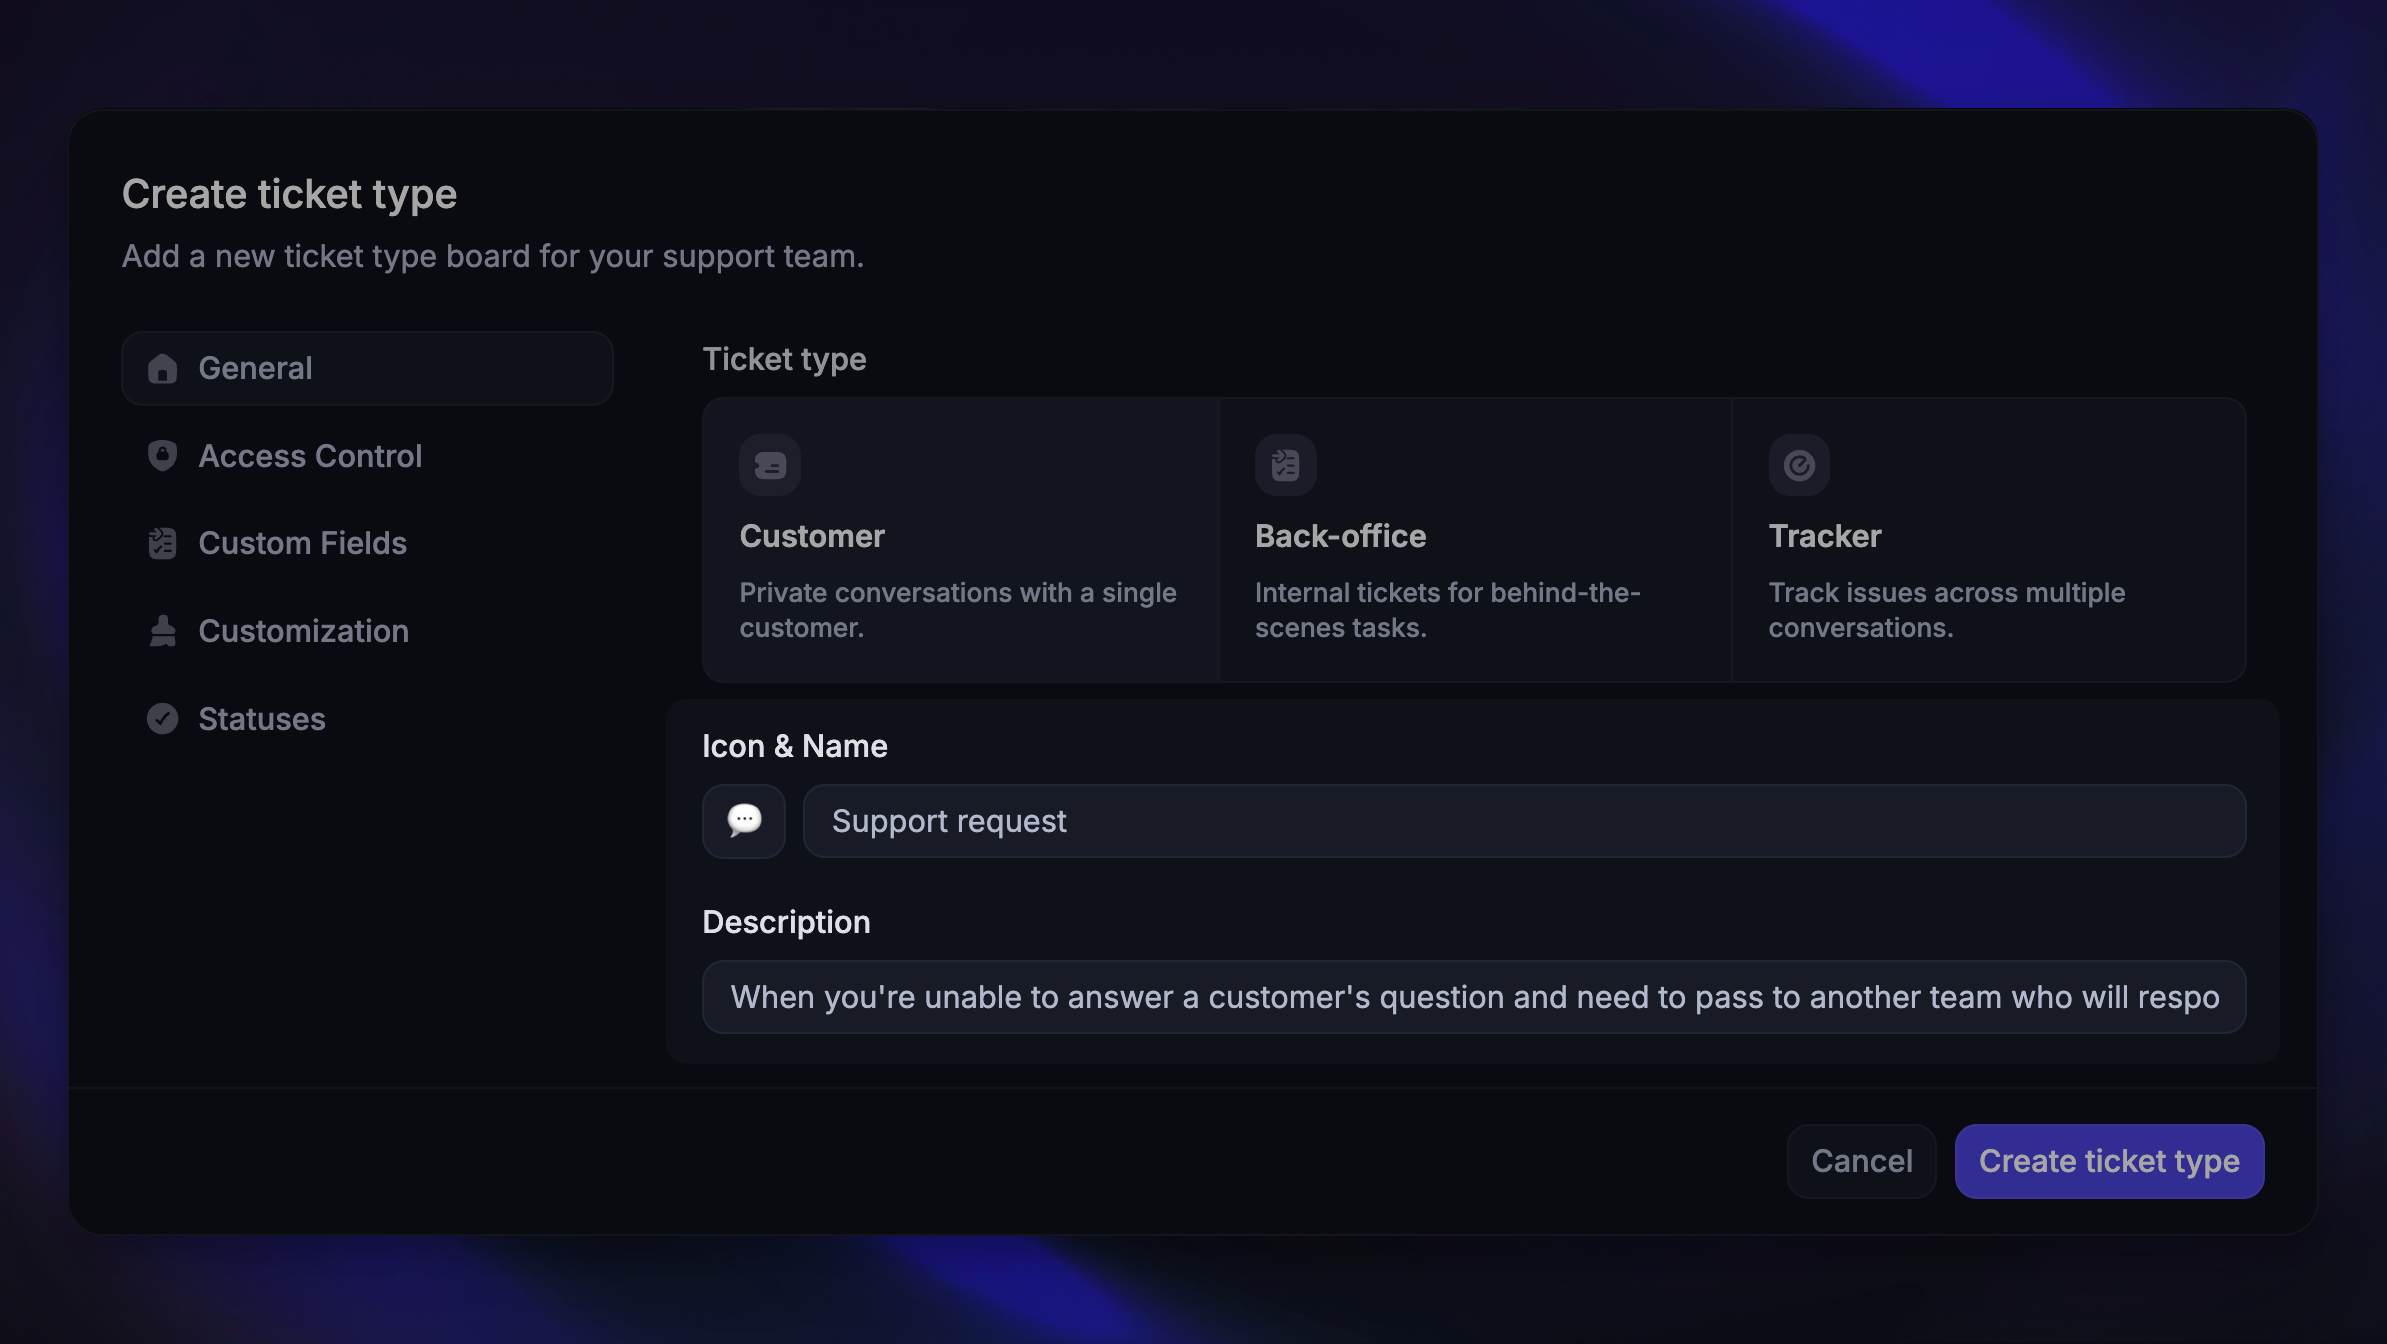
Note: Each ticket type must have a unique name across your workspace.
Configure access control (Customer tickets only)
The Access Control section is only available for Customer ticket types. Back-office and Tracker tickets have fixed visibility rules (Back-office tickets are always internal, Tracker tickets are always scoped to the author's company).
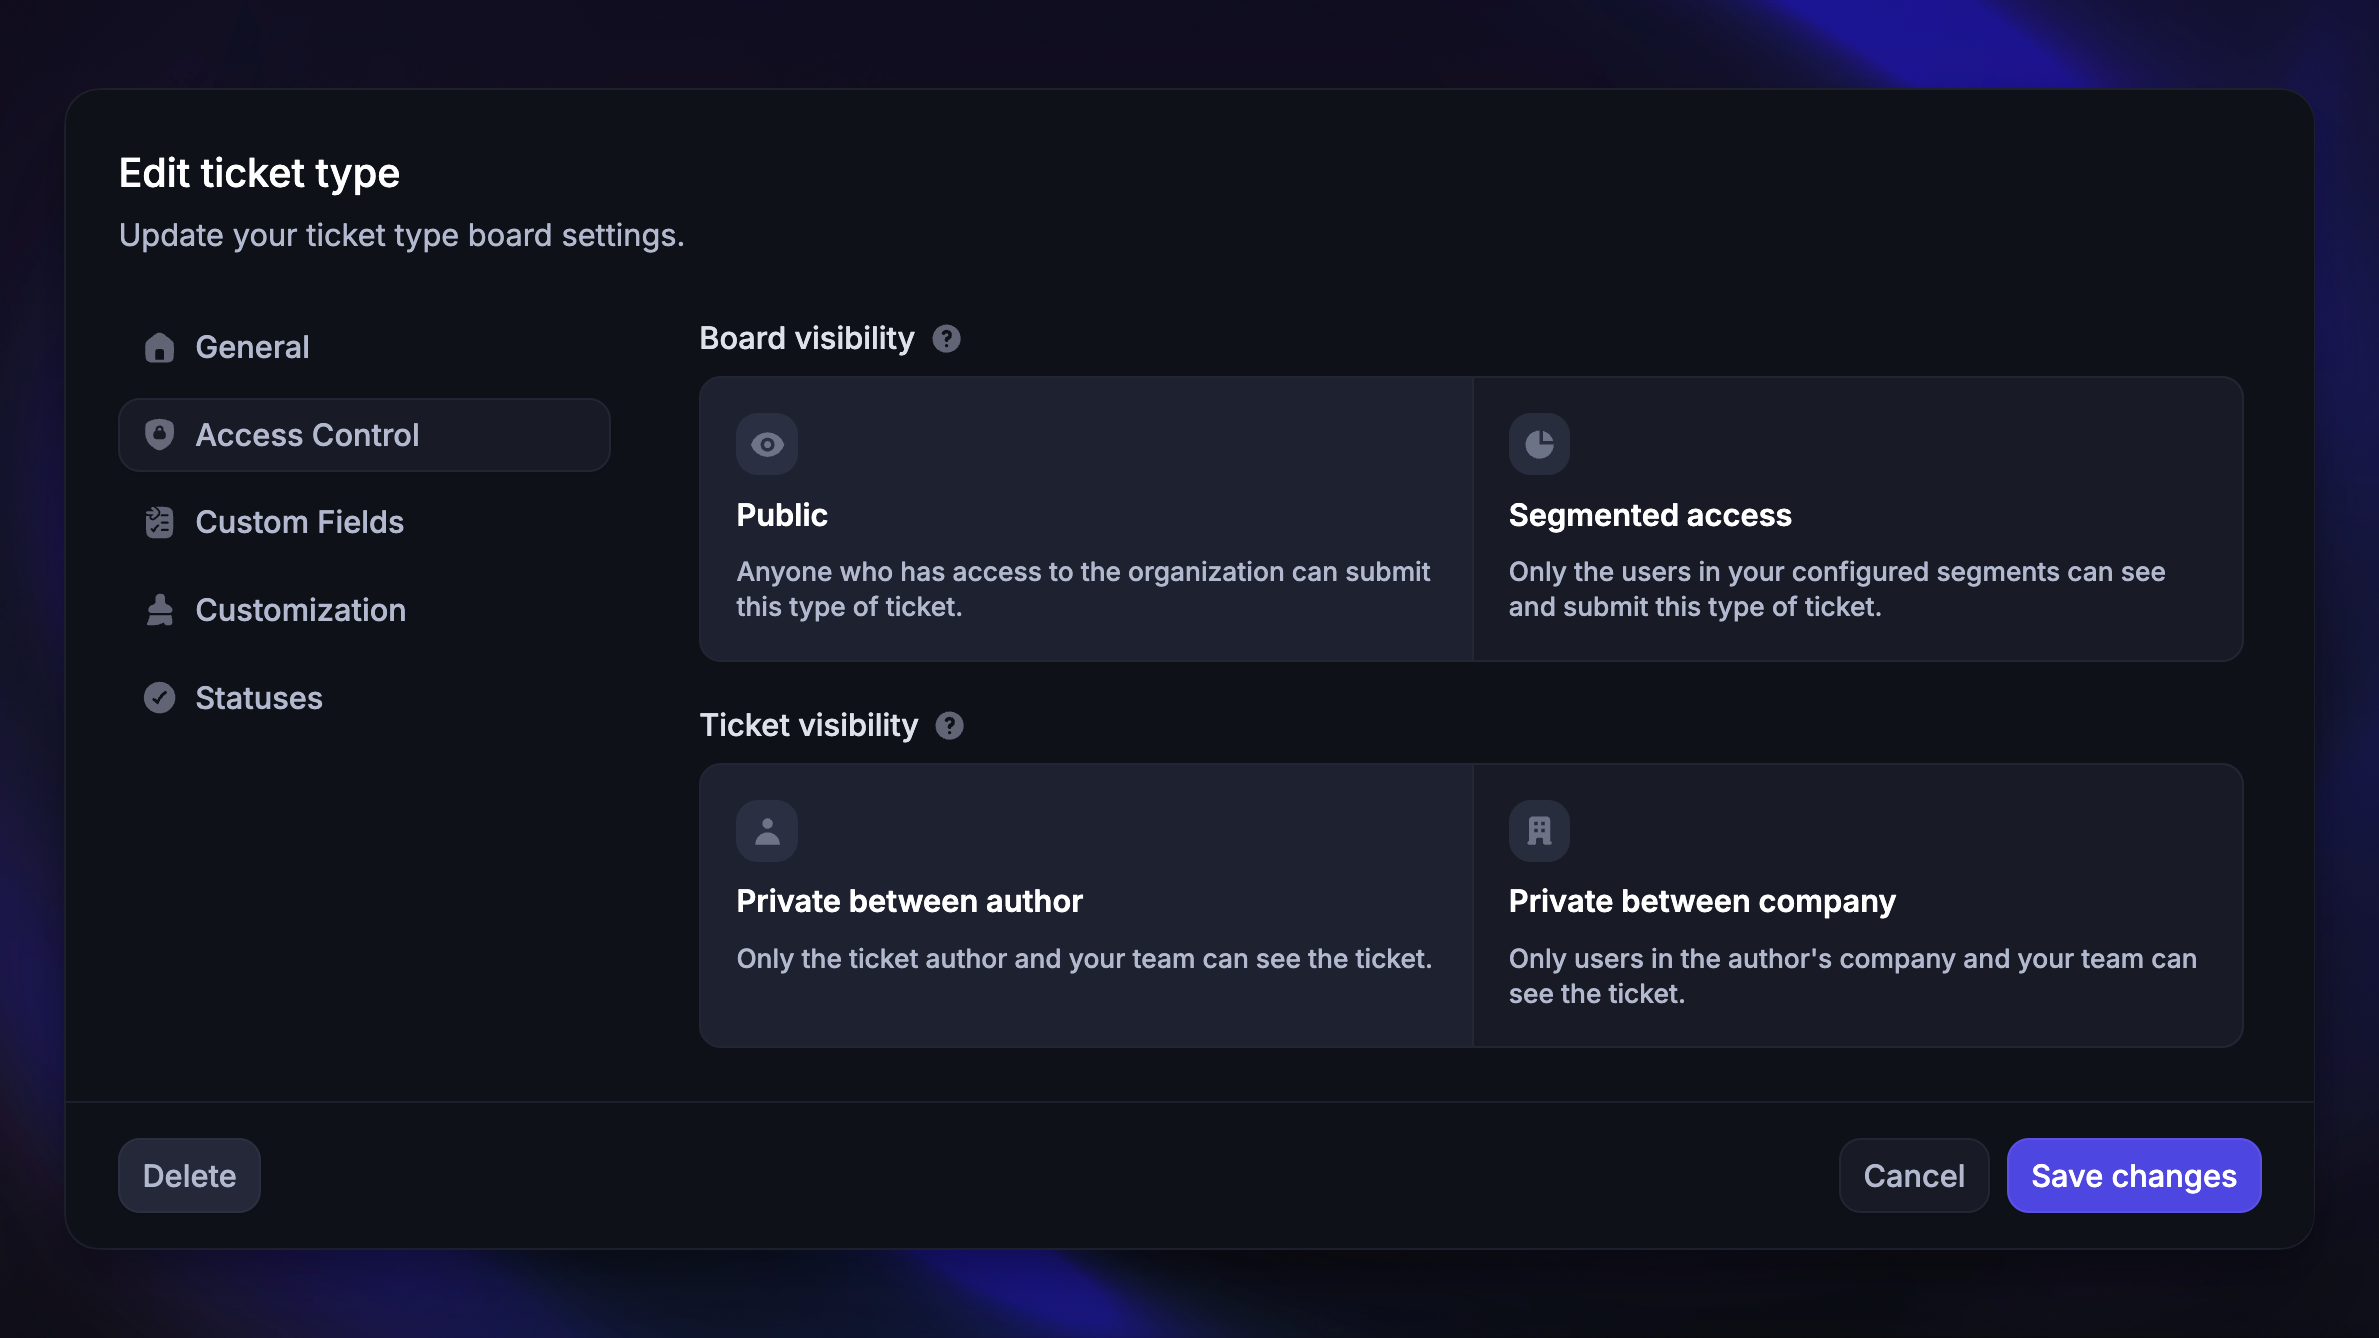
For Customer tickets, you can configure two levels of visibility:
General visibility controls the board customer group who can see and submit this ticket type:
Public - Anyone who has access to your workspace can submit this type of ticket
Segmented access - Only users in specific segments can see and submit tickets
Ticket visibility controls who can see the individual tickets after they are submitted:
Private between author (default) - Only the ticket author and your team can see the ticket
Private between company - Only the user, their company, and your team can see the ticket
Add custom fields
Custom fields let you capture additional structured information when tickets are created.
Click the Custom Fields section to manage fields for this ticket type. You can:
Use existing - Attach a custom field that already exists in your workspace
Create new - Create a new custom field from scratch
Available field types
Available field types
When creating a new custom field, choose from the following types:
Text - A standard text entry field
Number - A field that only accepts numbers
Select option - A dropdown where users select one option
Multi-select option - A dropdown where users can select multiple options
Checkbox - A simple yes/no toggle
Date - A date picker
File upload - Allows users to upload files
Custom field settings
Custom field settings
For each custom field, you can configure:
Label - The name of the field (required)
Placeholder - Hint text shown inside the field (Text and Number types only)
Required field - Whether the field must be filled in before submitting
Show answer to everyone - Makes the field value visible to all users viewing the ticket
Internal field - Makes the entire field visible only to your internal team
Tip: Placeholders are useful for specific instructions or clarifying the exact information you require from the customer.
How custom fields appear to customers
How custom fields appear to customers
When customers submit a ticket, the field type you choose determines how the input appears to them. Choosing the right type makes it easier for customers to give you the information you need.
Here is how each field type appears to customers:
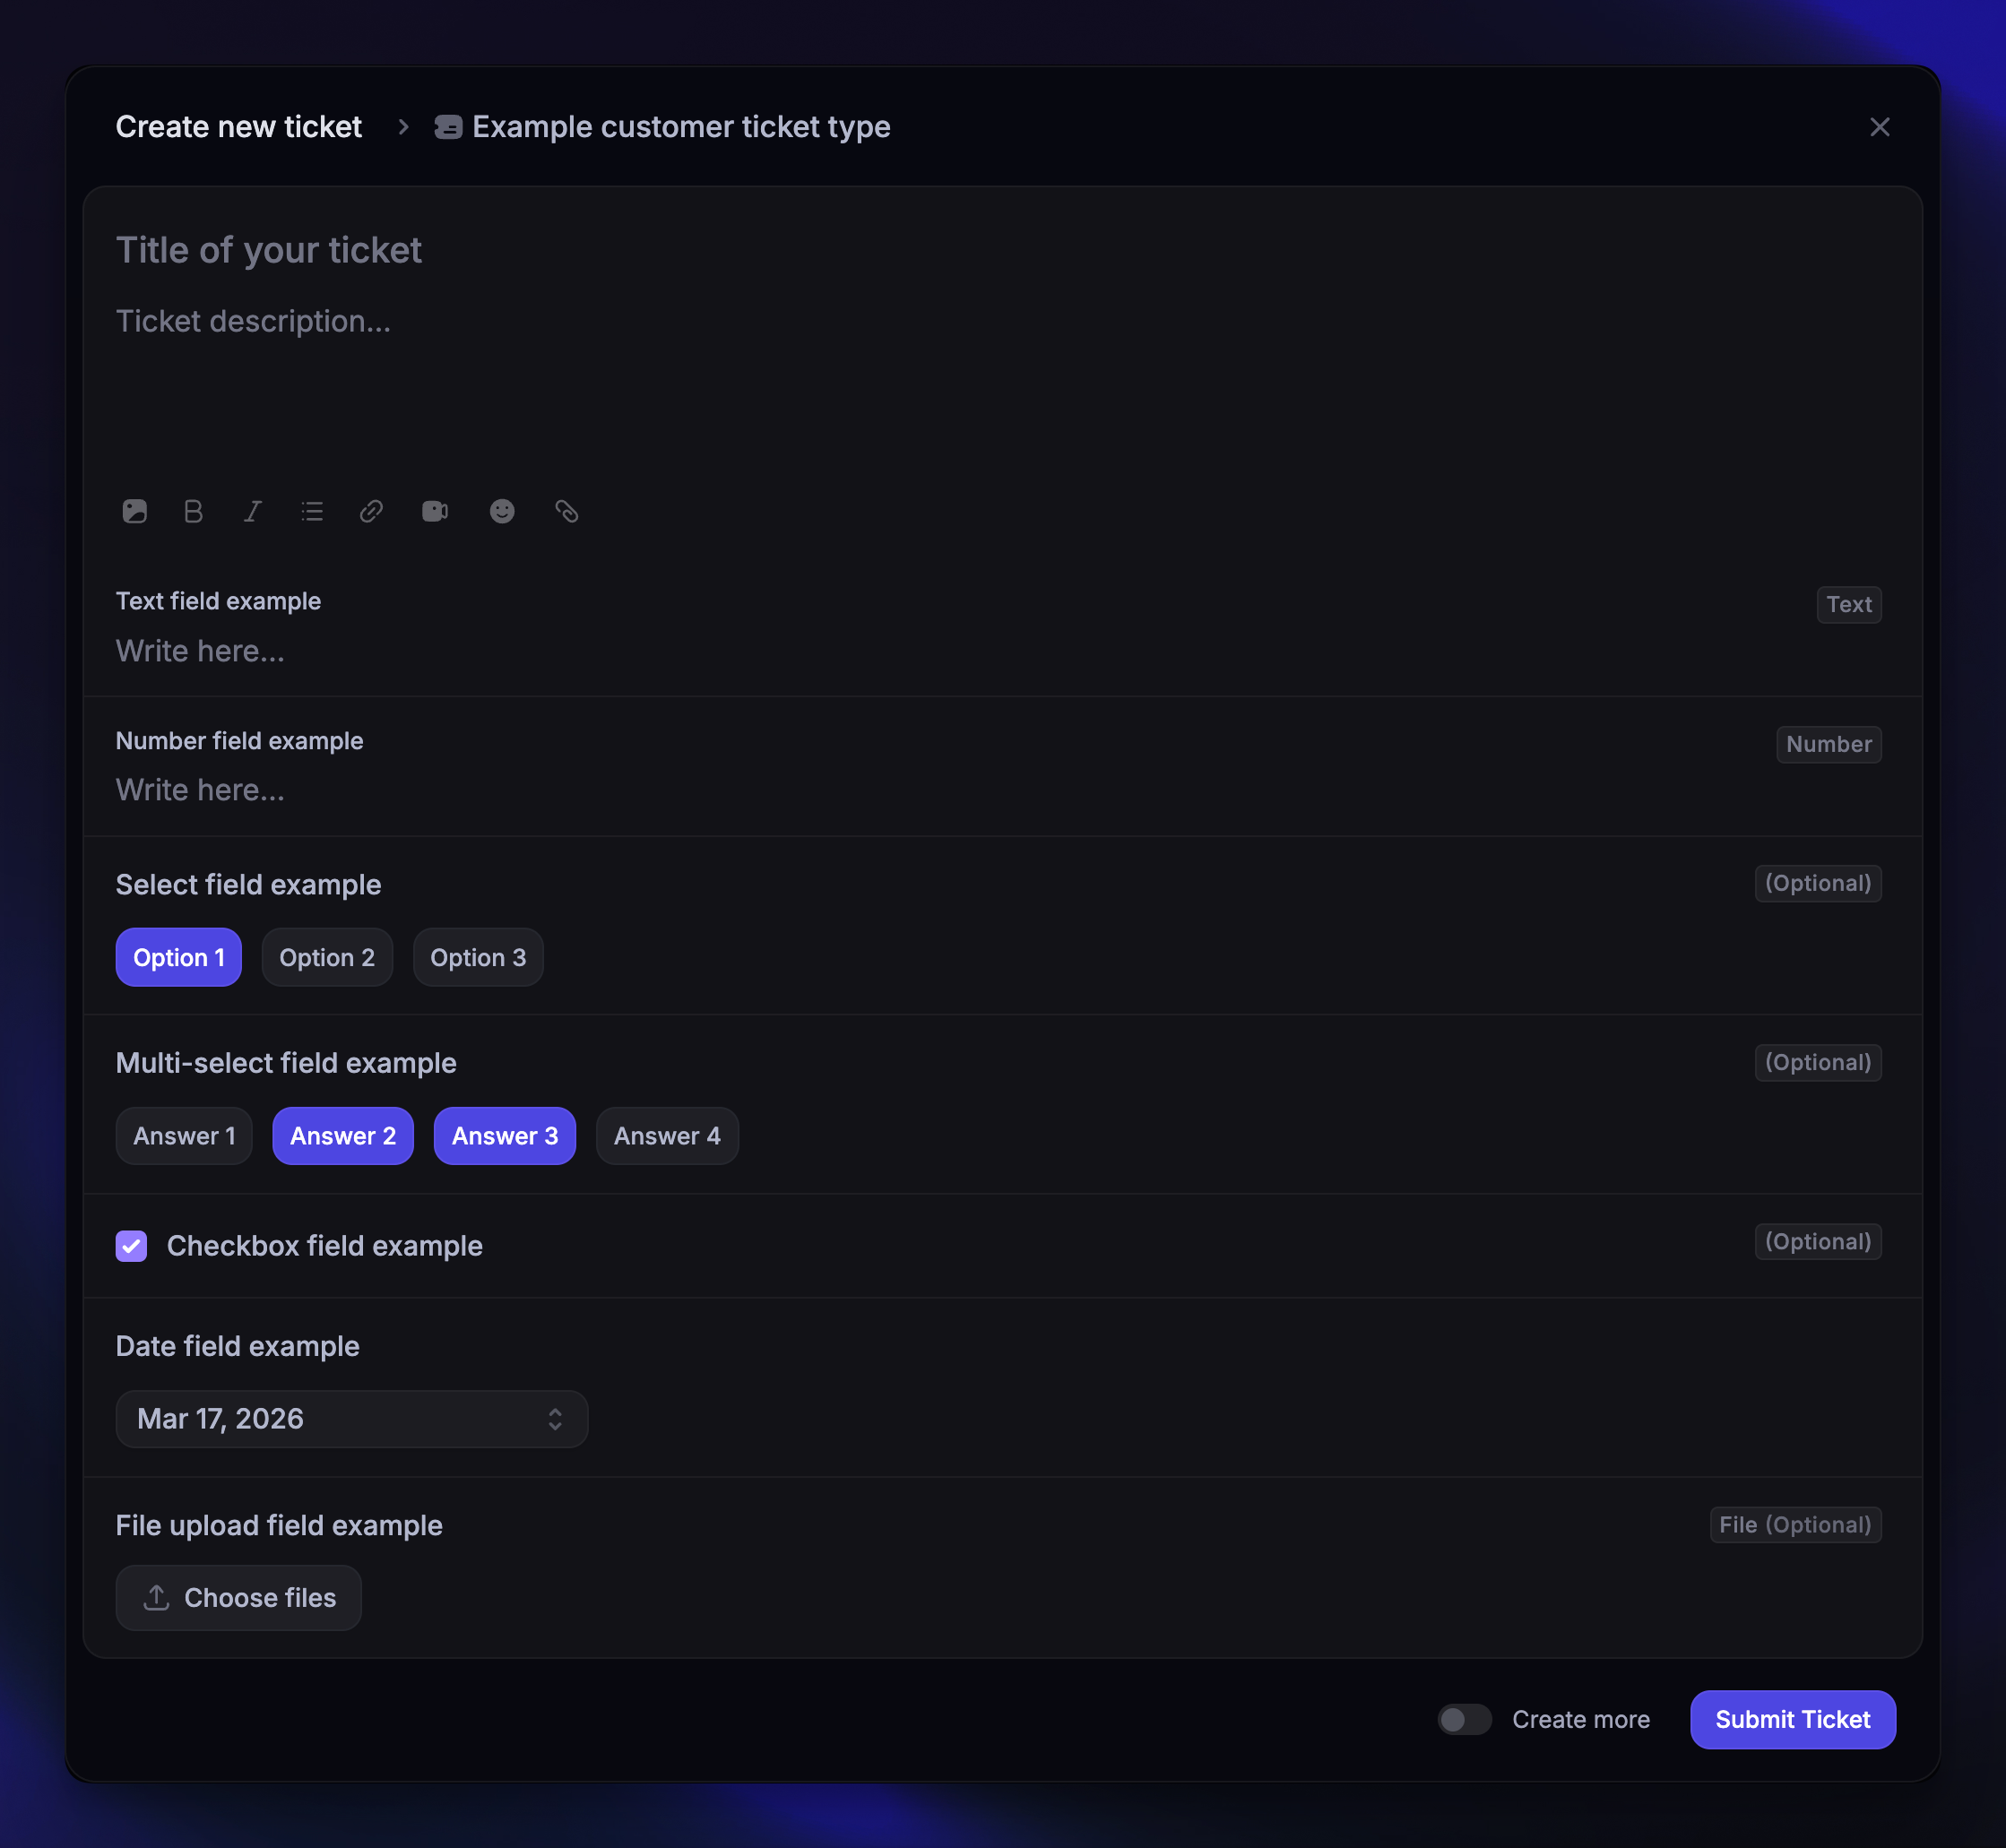
Text - A text entry field that supports multiple lines
Number - A field that only accepts numeric input
Select - When <6 options: clickable buttons displayed inline. When >6 options: a searchable dropdown menu
Multi-select - Same as Select, but customers can choose multiple options
Checkbox - A single checkbox with the field label next to it
Date - A button that opens a date picker with calendar and quick-select options
File upload - A drag-and-drop area where customers can upload files (supports multiple files if enabled)
Each field also displays an (Optional) badge in the top right if it is not required.
Tip: Use Select instead of Text for predefined options - it reduces errors and makes it faster for customers to submit tickets.
Note:
Custom fields can be reordered by dragging them in the list. The order you set here is the order they appear in the ticket creation form.
Ticket type names and fields don’t get translated / localized in the Messenger, even if you support multiple languages.
File upload attributes support all common file formats.
Customize title & description placeholders
All ticket types come with two default fields: title and description.
Both are always visible to customers and teammates, and the title is always required when creating a ticket.
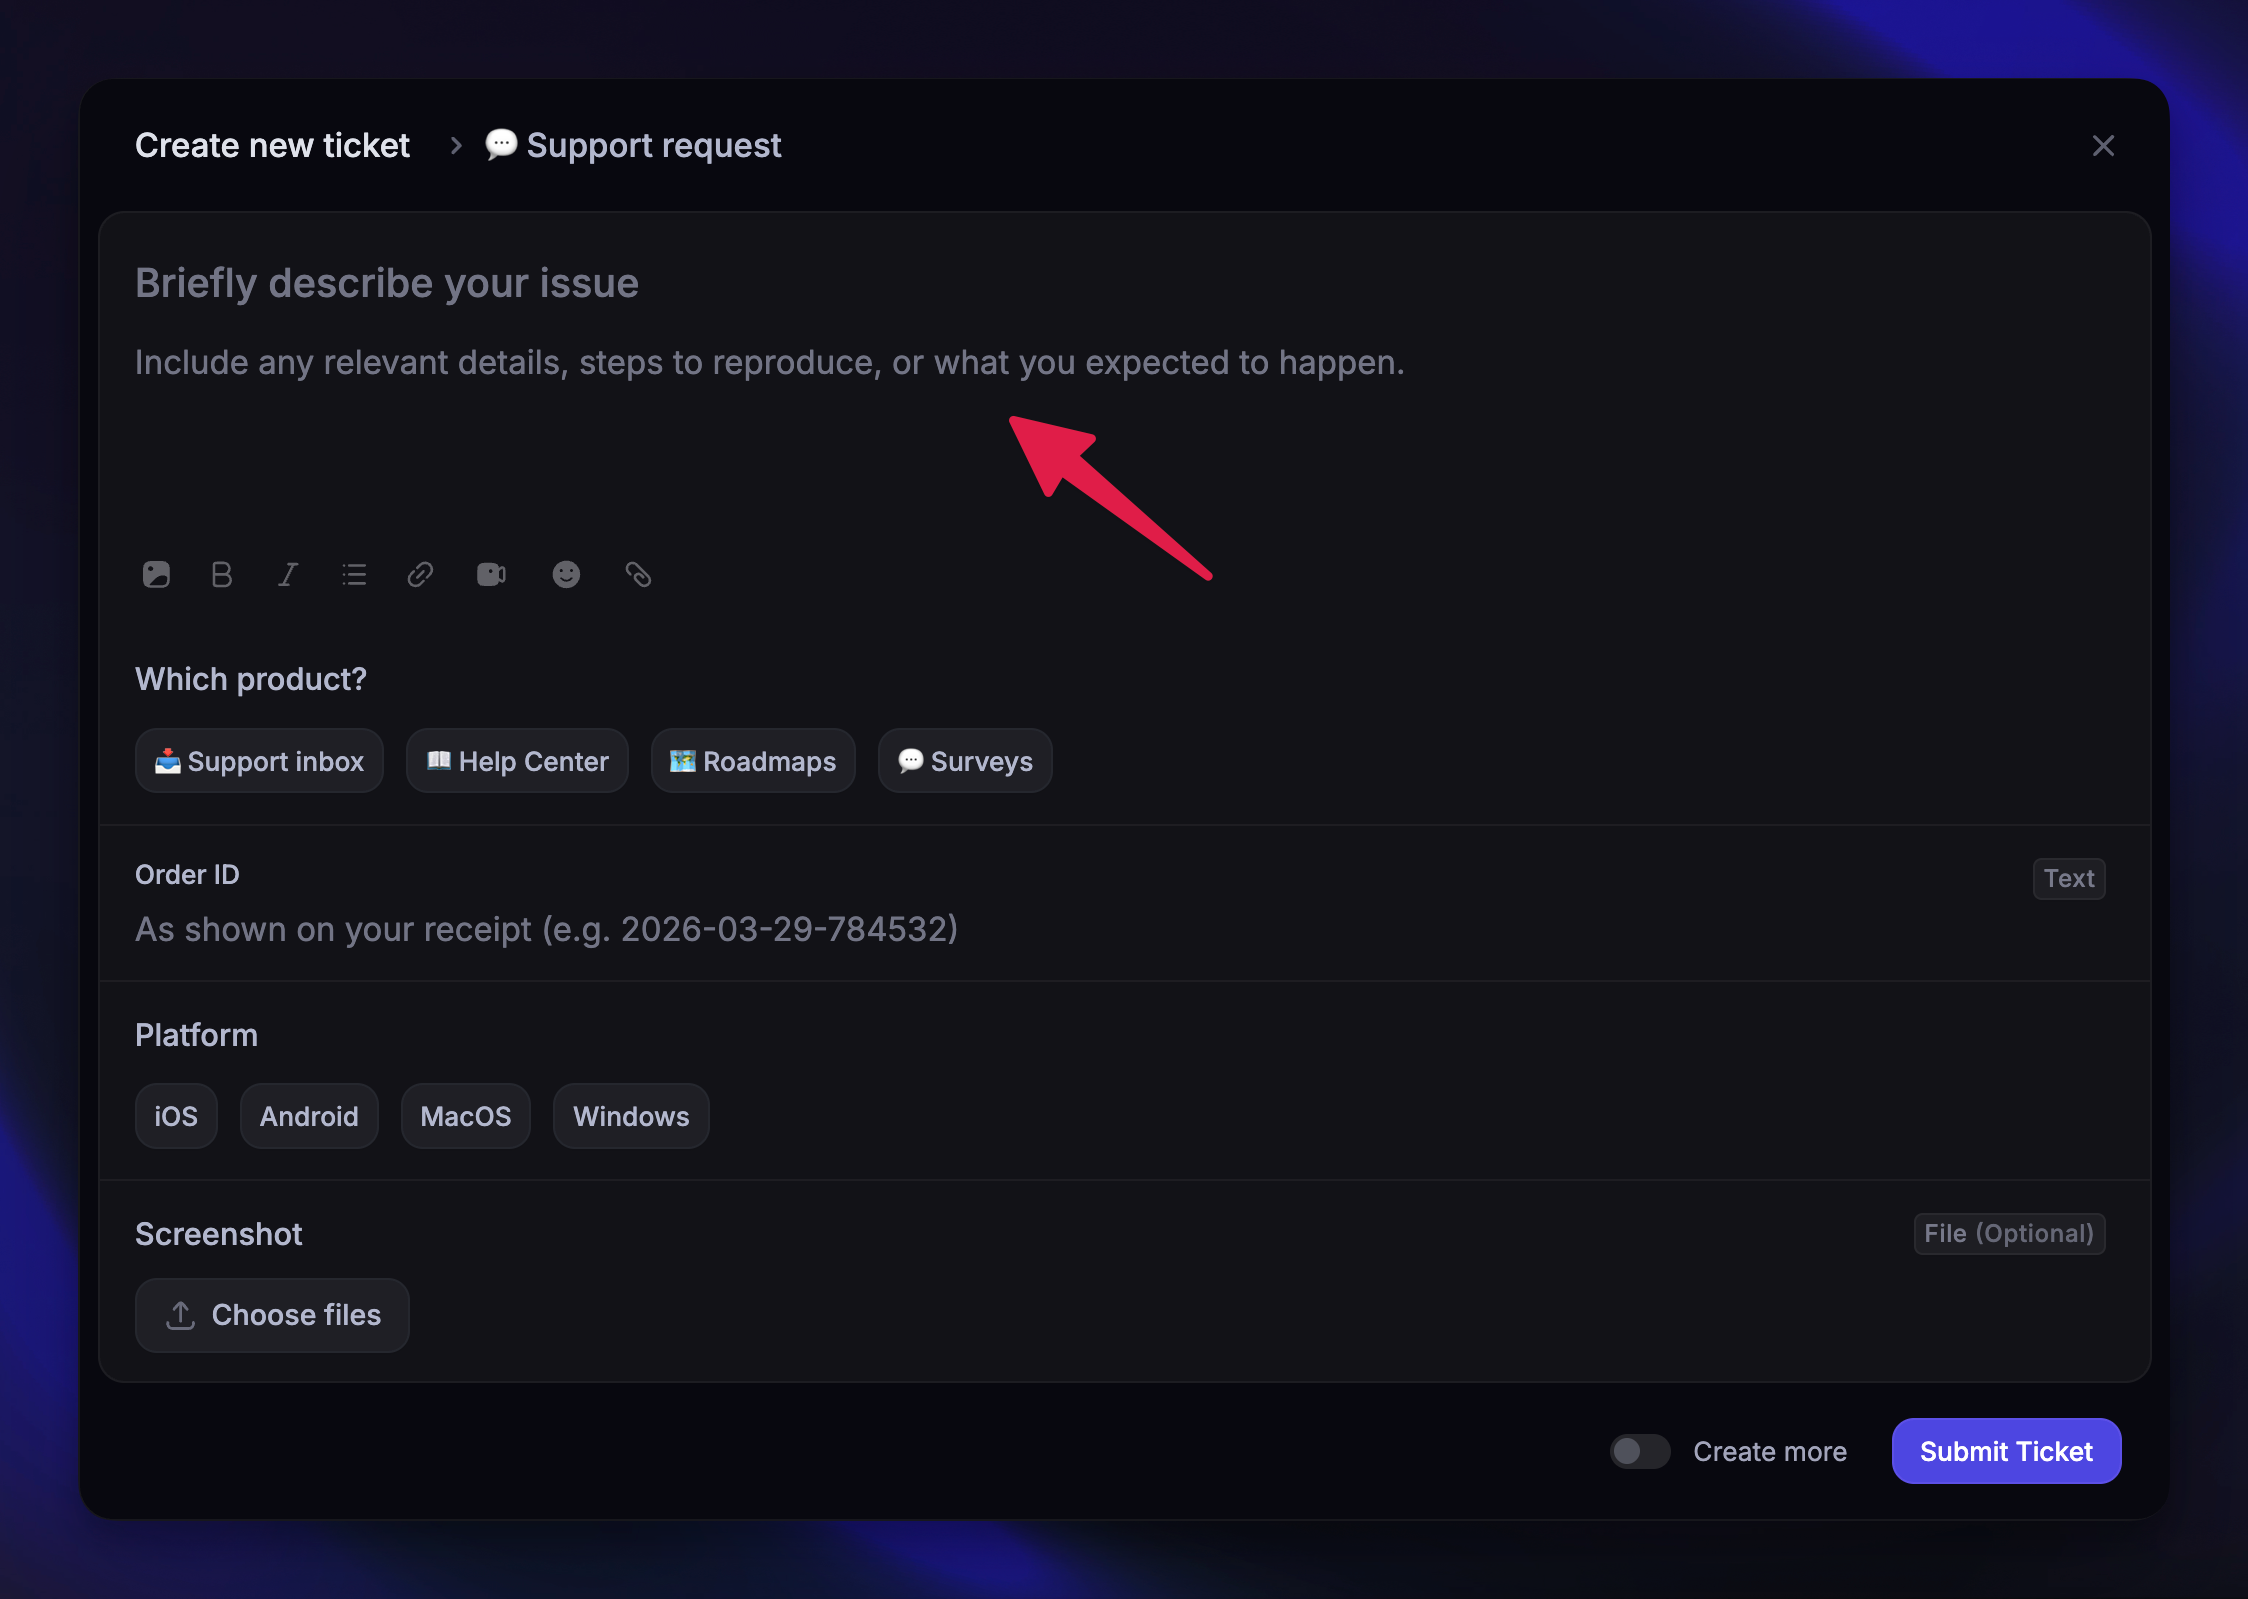
Under the Customization tab, you can set custom placeholder text for these fields to guide your team and customers on what information to include. If you don't set a custom placeholder, a generic default is shown (e.g. Title of your ticket).
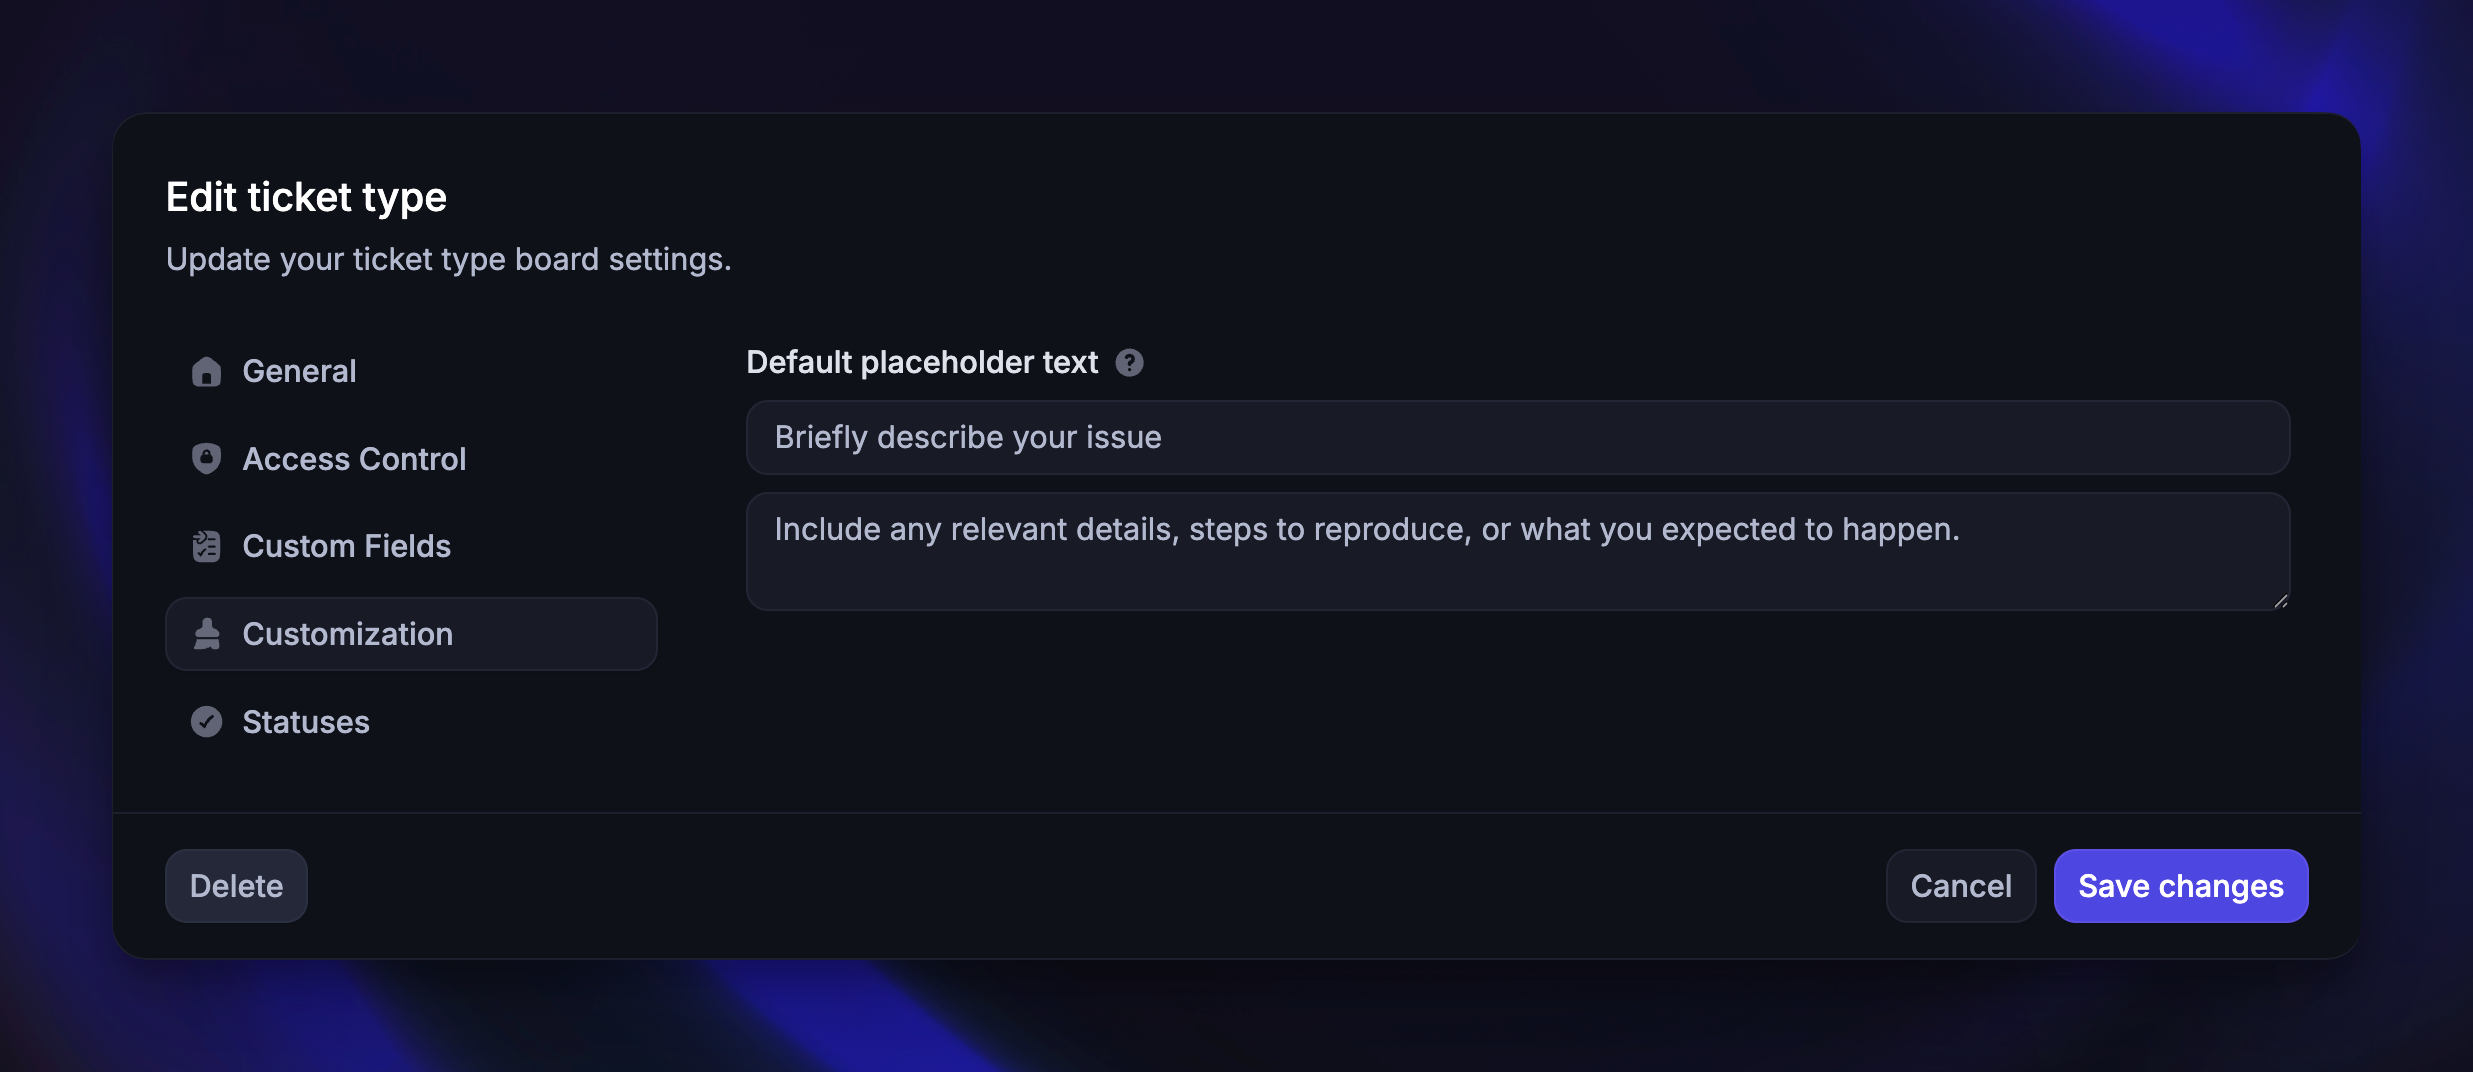
How the ticket title & description appear to customers
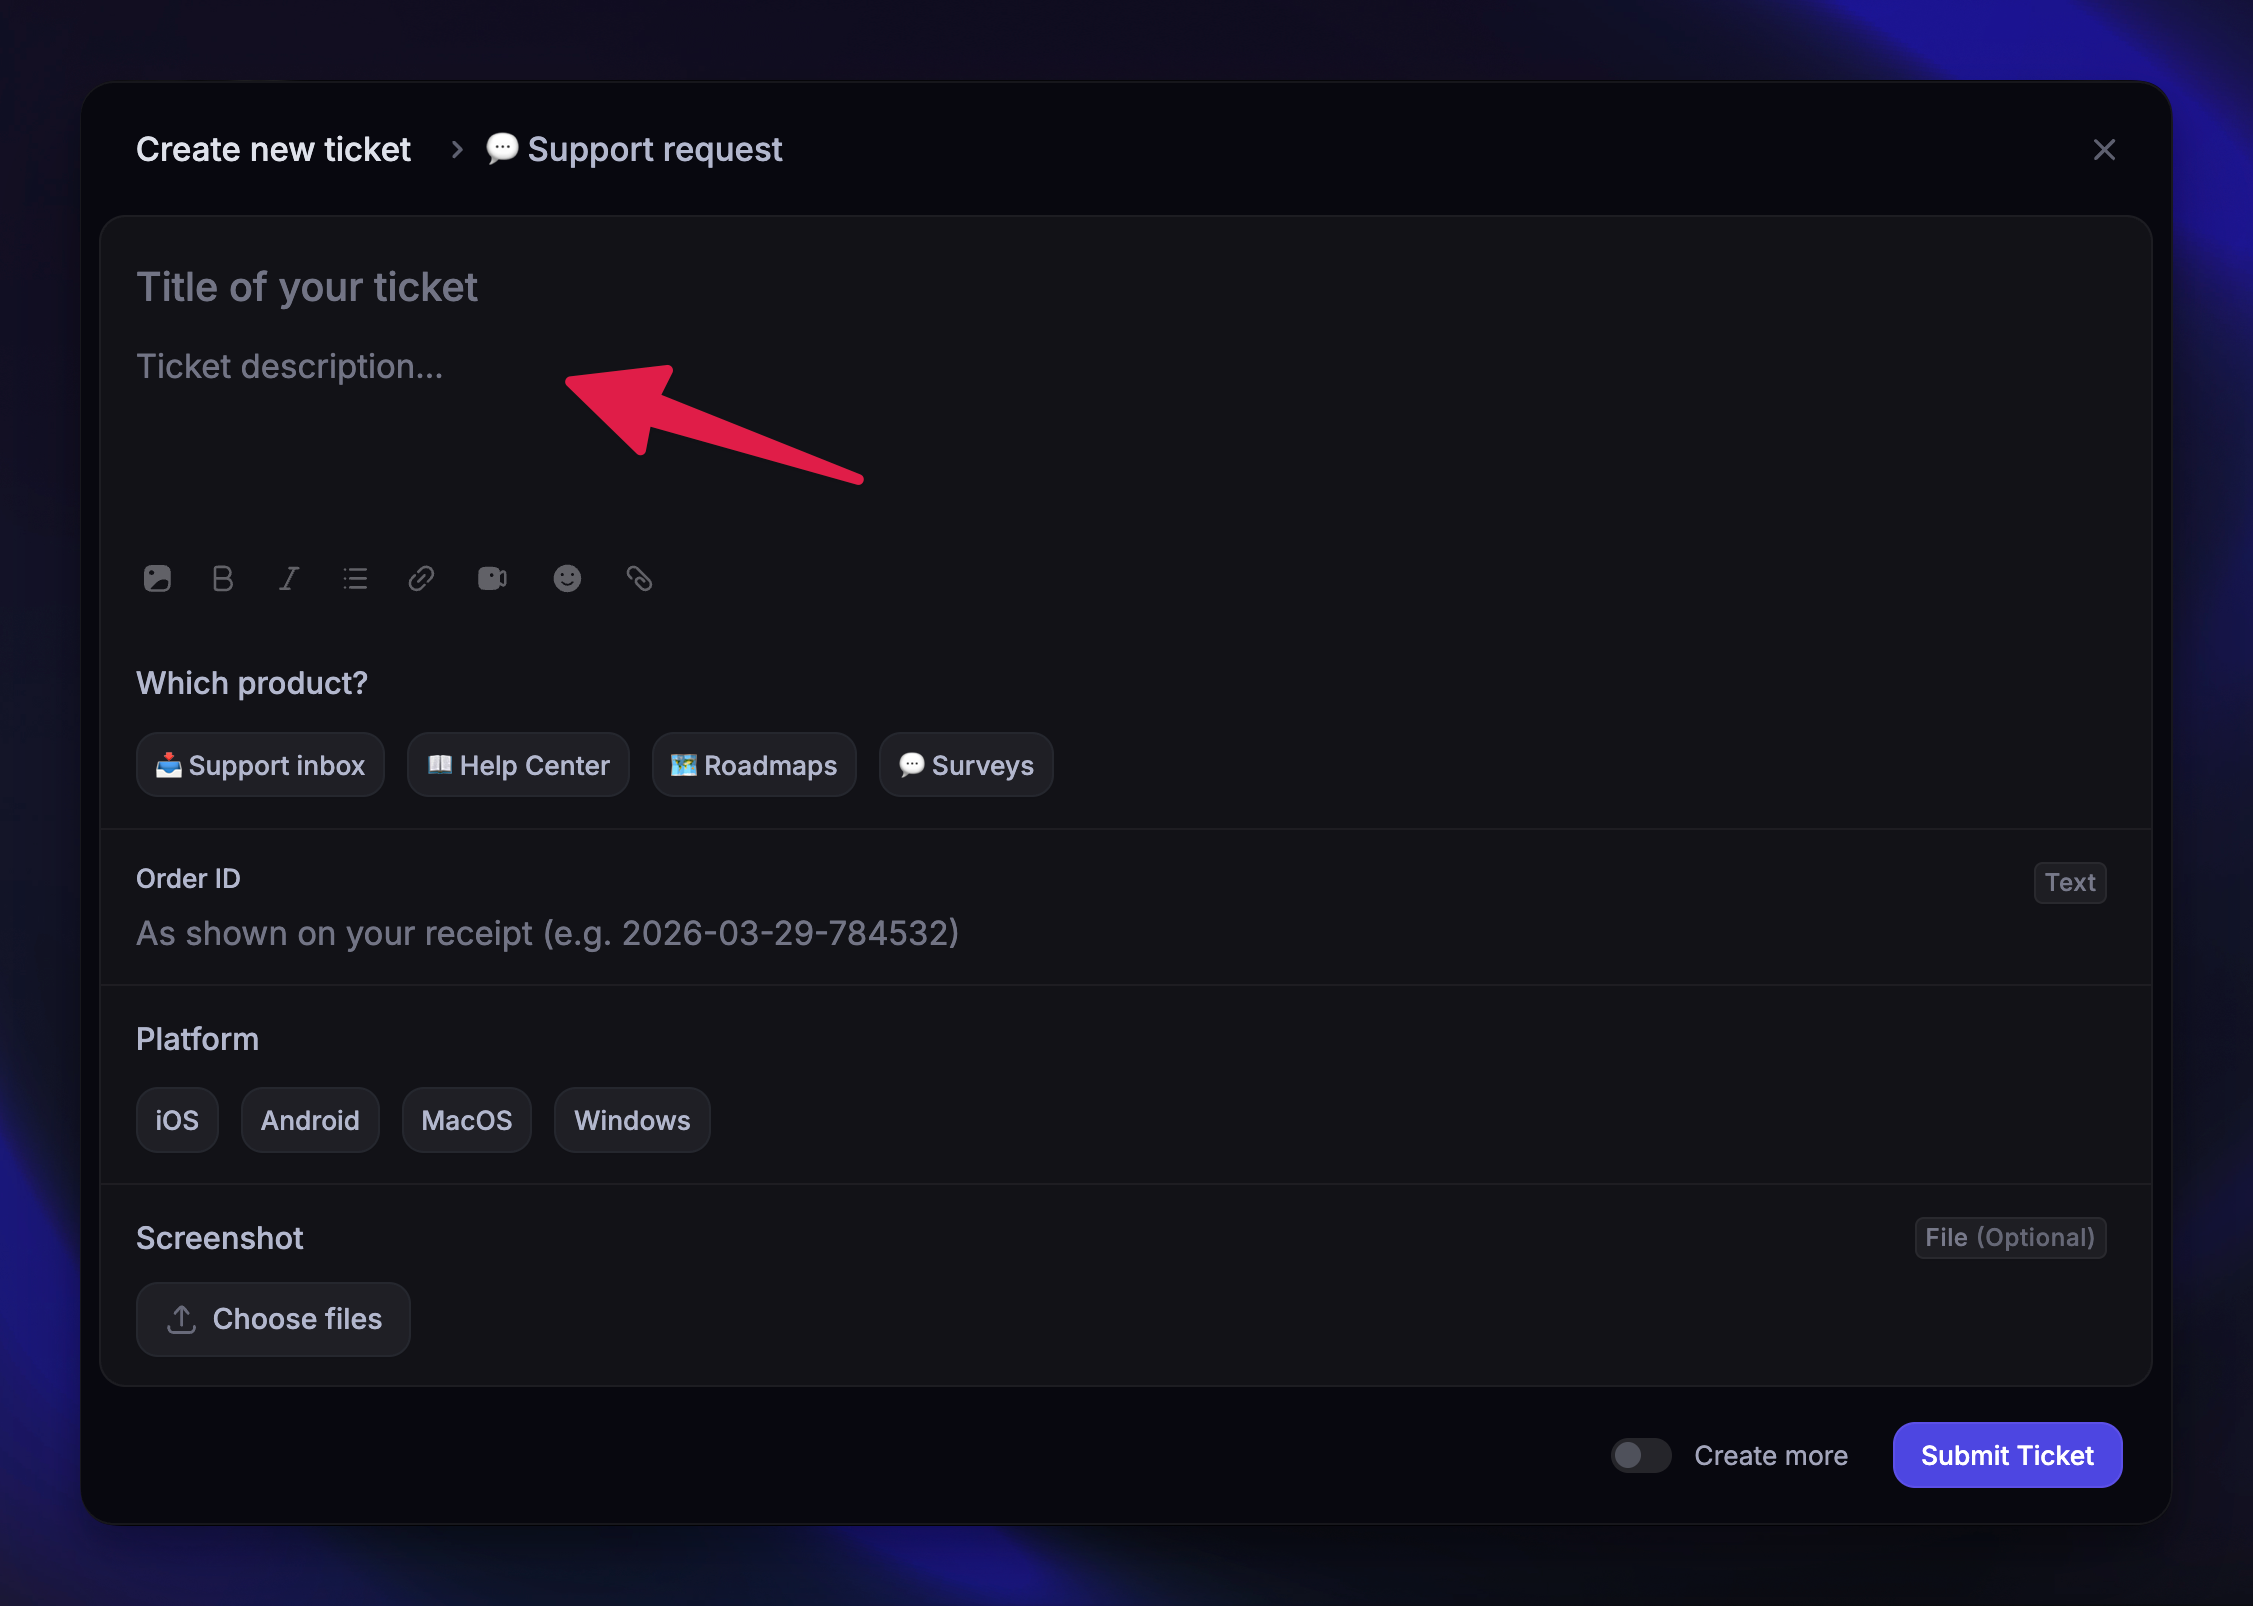
How the ticket title & description appear to customers
Here is how the default title and description appear to customers:
Here is how a customized title and description appear to customers:
Configure statuses
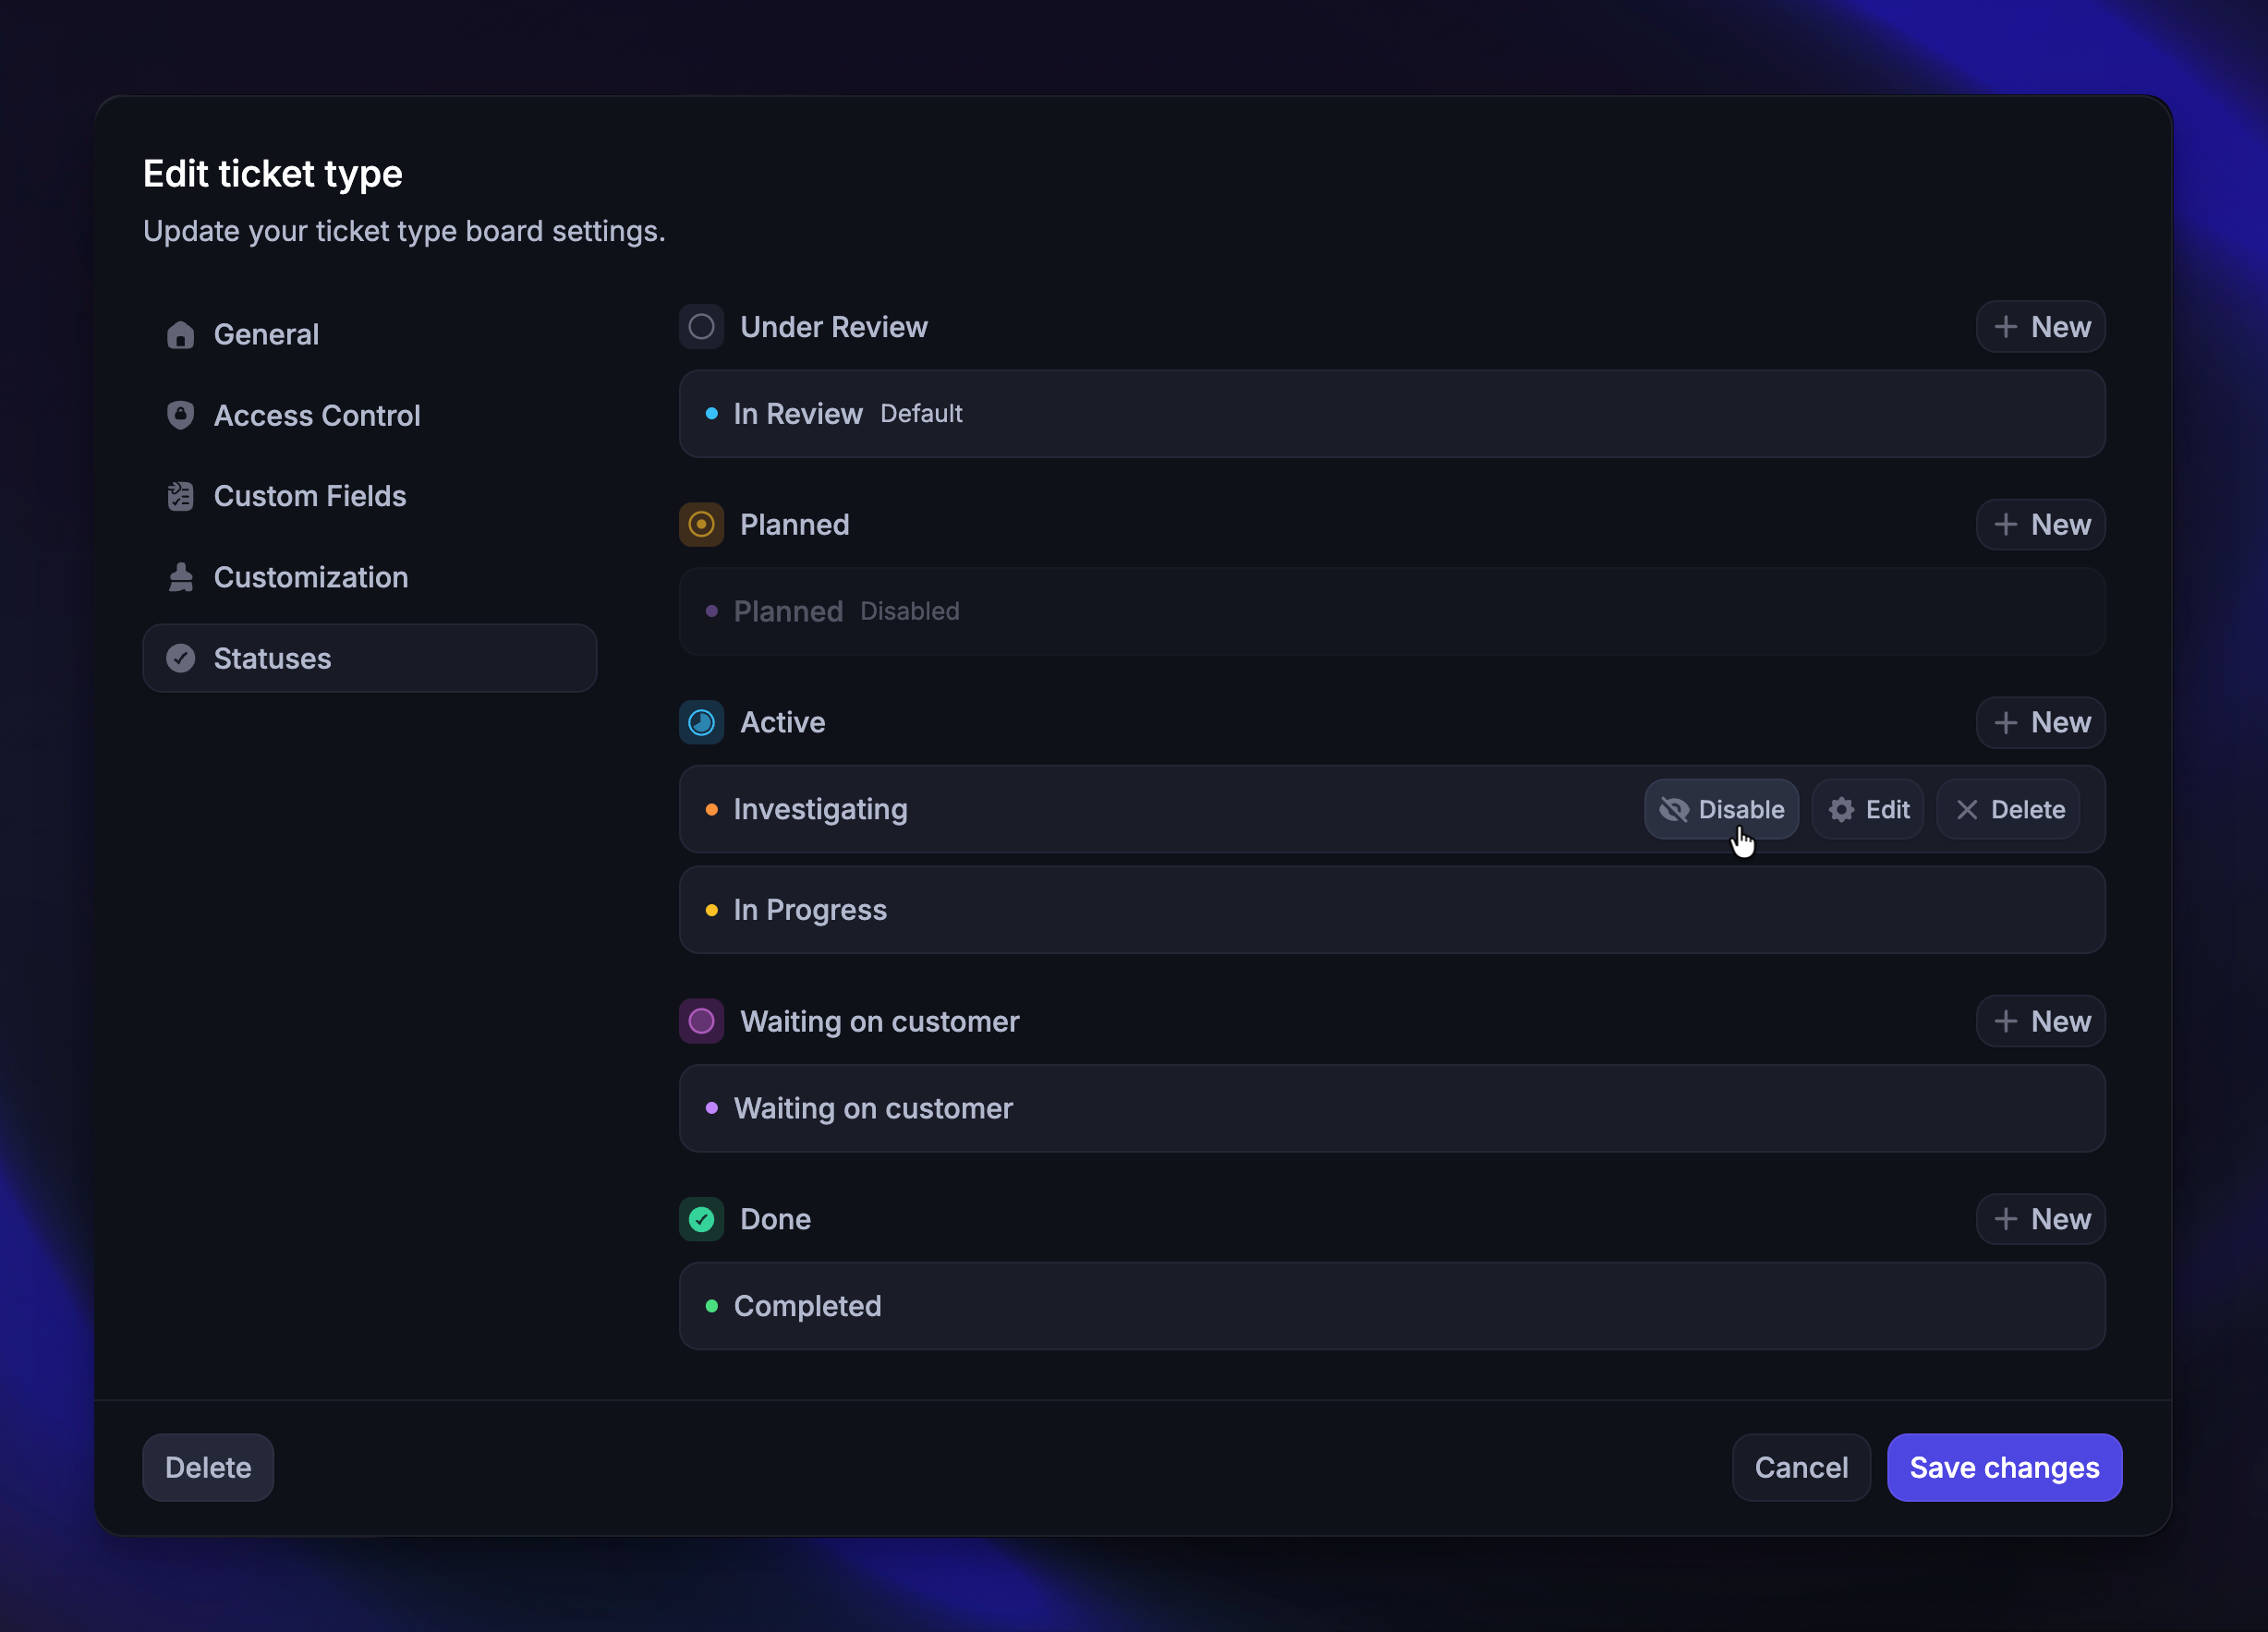
The Statuses section lets you control which statuses are available for this specific ticket type. All ticket types share the same global status pool, but you can enable or disable individual statuses per ticket type.
Statuses are organized into 4 categories:
Under Review - Tickets that are being reviewed before any action is taken
Active - Tickets that are actively being worked on
Waiting on customer - Tickets awaiting a response or action from the customer
Done - Tickets that have been resolved
You can:
Enable/Disable existing statuses for this ticket type individually.
Create new statuses within any category directly from the modal
Edit status name and color
Delete statuses (except default ones). All tickets using a deleted status will be moved to "In Review"
You can manage the global statuses across your workspace from Settings → Support → Ticketing → Ticket states page.
Edit or delete an existing ticket type
To modify a ticket type's settings or delete it:
Find the ticket type under its category (Customer, Back-office, or Tracker)
Hover over it and click the settings icon on the right
From here, you can update any of the 5 configuration sections described above.
To delete this ticket type, click ‘Delete’ at the bottom left of the modal.
Note: Deleting a ticket type is permanent and cannot be undone. All tickets in this board will be permanently deleted.
FAQs
Can I change the ticket category after creating a ticket type?
Can I change the ticket category after creating a ticket type?
Yes. You can change a ticket type's category (e.g. from Customer to Back-office) by editing the ticket type. However, be aware that changing the category will change the visibility and communication rules for all existing tickets in that board.
Can I use the same custom field across multiple ticket types?
Can I use the same custom field across multiple ticket types?
Yes. Custom fields are workspace-level and can be attached to multiple ticket types using the Use existing button.
Is there a limit to how many custom fields I can add?
Is there a limit to how many custom fields I can add?
There is no hard limit on the number of custom fields you can add to a ticket type.
What happens to tickets if I delete a status?
What happens to tickets if I delete a status?
All tickets using the deleted status will be moved to the default "In Review" status. Default statuses cannot be deleted.
Can different ticket types use different statuses?
Can different ticket types use different statuses?
Yes. While all statuses are managed globally, you can enable or disable specific statuses for each ticket type from the Statuses section in the ticket type settings.
Still need help? Ask the team